Meat Slicer Anatomy 101 Understanding the Blade, Motor, and Key Parts

A home electric meat slicer is more than just a spinning blade. Its performance, safety, and longevity hinge on three core modules: the cutting blade, the drive motor, and the suite of removable parts. Understanding what each part does, what it’s made of, and how to care for it is the key to mastering your machine, whether it’s a compact 200W model or a larger deli-style unit. This guide breaks down each component for the home user.
Table of Contents
Part 1: The Blade – The Heart of the Cut
The blade is the business end of your meat slicer. Its quality dictates everything from slice consistency to what you can safely cut.
- Its Core Job: To cleanly and uniformly slice through food at high speed (approx. 3000 RPM for a 200W model), with thickness adjustable from paper-thin to about 15mm.
- Key Specs & Materials:
- Material: High-quality, food-grade stainless steel (304/316 series) is standard. It resists corrosion and is safe for food contact. Premium blades may have a non-stick PVD coating for easier cleaning and extra durability.
- Design: A circular, precision-honed edge (typically 8-10 inches in diameter) ensures sharpness. Some blades have a textured or serrated section near the hub to grip softer foods and prevent slipping.
- Mounting: Designed for safe removal via a center locking nut for cleaning and replacement.
- Use & Care Essentials:
- What to Cut: Boneless meats (roast beef, turkey, ham), hard cheeses, salami. Never cut bones, frozen solid food, or fibrous materials like rope.
- Pro Tip: Chill soft meats or cheeses slightly before slicing for cleaner, less messy cuts.
- Cleaning & Storage: Clean after every use with a soft brush and mild detergent. Never use steel wool. Dry thoroughly and apply a light food-grade oil before long-term storage to prevent rust.
Part 2: The Motor – The Powerhouse
The motor is the unsung hero that converts electricity into the spinning force of the blade.
- Its Core Job: To provide consistent, reliable power to drive the blade at a stable speed, enabling smooth slicing without stalling.
- Key Specs & Features (for a 200W Home Model):
- Power (Wattage): 200W is ideal for home use, balancing sufficient power for most tasks with energy efficiency.
- Thermal Protection: A critical safety feature. If the motor overheats from prolonged use or a jam, it will shut off automatically to prevent burnout.
- Build & Ventilation: Look for motors housed in well-ventilated compartments, sometimes with cooling fans, to manage heat during extended sessions.
- Use & Care Essentials:
- Duty Cycle: Respect the motor. For a 200W home meat slicer, limit continuous run time to 30-40 minutes, then allow a cool-down period.
- Listen & Feel: Unusual vibrations, grinding noises, or a burning smell are immediate signs to stop and unplug the machine for inspection.
- Keep it Dry & Ventilated: Always ensure ventilation slots are unobstructed. Store the slicer in a dry place away from direct moisture.
Part 3: The Removable Parts – Safety & Convenience Features
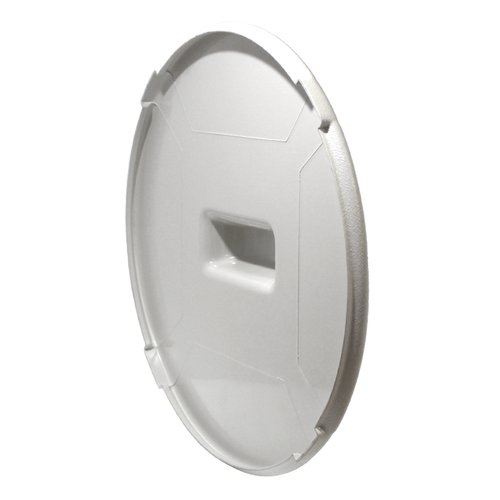
These components don’t provide power, but they define the safety and user-friendliness of your slicer.
- The Blade Guard / Food Shield:
- Function: #1 Safety Feature. It creates a physical barrier between your hands and the spinning blade. It also dramatically contains food splatter.
- Detail: Should be sturdy, easily removable for cleaning, and ideally feature an interlock switch that prevents the motor from running if the guard is not correctly attached.
- The Drip Tray / Food Carriage:
- Function: Catches sliced food and juices, keeping your counter clean. It often also acts as the sliding platform that feeds food into the blade.
- Detail: Usually made of easy-clean plastic or stainless steel. It should slide smoothly and lock securely in place.
- The Thickness Adjustment Knob:
- Function: Allows you to dial in your desired slice thickness, typically from 0 to 15mm. Precision here is key for consistent results.
- Detail: Should turn smoothly with clear numerical or marked indicators. A locking mechanism is a premium feature that prevents the setting from shifting during use.
- Use & Care Essentials:
- Always Use the Guard: Never operate the slicer without the blade guard properly installed.
- Clean Immediately: These parts collect food residue. Clean them after each use to prevent bacterial growth and stickiness.
- Lubricate Moving Parts: Occasionally apply a drop of food-safe lubricant to the thickness adjustment mechanism to keep it turning smoothly.
How It All Works Together: The Slicing Cycle
The process is a simple synergy: You set the thickness, turn on the motor, and place food on the carriage. The motor spins the blade, you push the carriage (or the carriage auto-feeds), the blade cuts, the guard contains the mess, and the slices fall neatly into the tray.
Common Mistakes to Avoid
- Overworking the Motor: Pushing past the recommended duty cycle or trying to slice rock-hard frozen food.
- Neglecting the Blade: Using abrasive cleaners or allowing it to stay wet and rust.
- Bypassing Safety: Operating without the blade guard or with loose, incorrectly assembled parts.
- Incomplete Cleaning: Failing to disassemble and clean all removable parts and crevices after use.
Conclusion: Knowledge is Power (and Safety)
Understanding the role of the blade, motor, and removable parts on your meat slicer transforms it from a mysterious appliance into a tool you can use with confidence, efficiency, and safety. Proper care for each component ensures better slices, a longer machine life, and safer kitchen.
Ready to use your slicer like a pro? Start with a well-designed model where every part is built for performance and ease of use.